I noticed a lot of people have problems resizing images for their personal blogs. Not only do they eat up a lot of bandwidth, but huge images are a toil for those in dial-up. Here are some ways to make your pictures smaller while retaining the overall quality of the shots:
Note: Though you can always use Photoshop to resize images, these are two ways to make resizing faster
For Windows XP users

Windows XP Power Toys: Image Resizer
This is a small application that installs directly to the Windows XP UI. Now, everytime you right+click a picture, there will be a new option to “Resize Image.” All you do is choose the desired size. Usually for standard column blogs, the accepted width is 300. It’s free
For Mac users:
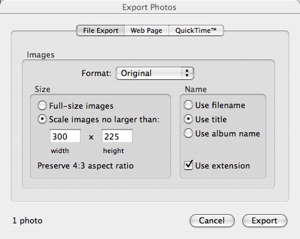
You can actually use the default screen capture app from the Mac but I prefer YellowMug’s SnapNDrag because of several other screencap options. Then, I just upload the picture to iPhoto and Export (click on the Share Tab and you’ll find it at the bottom). Resize the image and save! Again for blogs, using 300 for width is great.
If you have other tips on how to resize images, you could post them in the comments below and I’d be happy to add them.
One reply on “How To: Resize images when blogging”
Hi 😀